Summary
The Kennels screen is used to record and manage kennels within the practice. For configuration of Wards and Kennels see the Kennels Administration page.
Details
The Kennel screen can be accessed using the 'Kennel' button on the main toolbar.

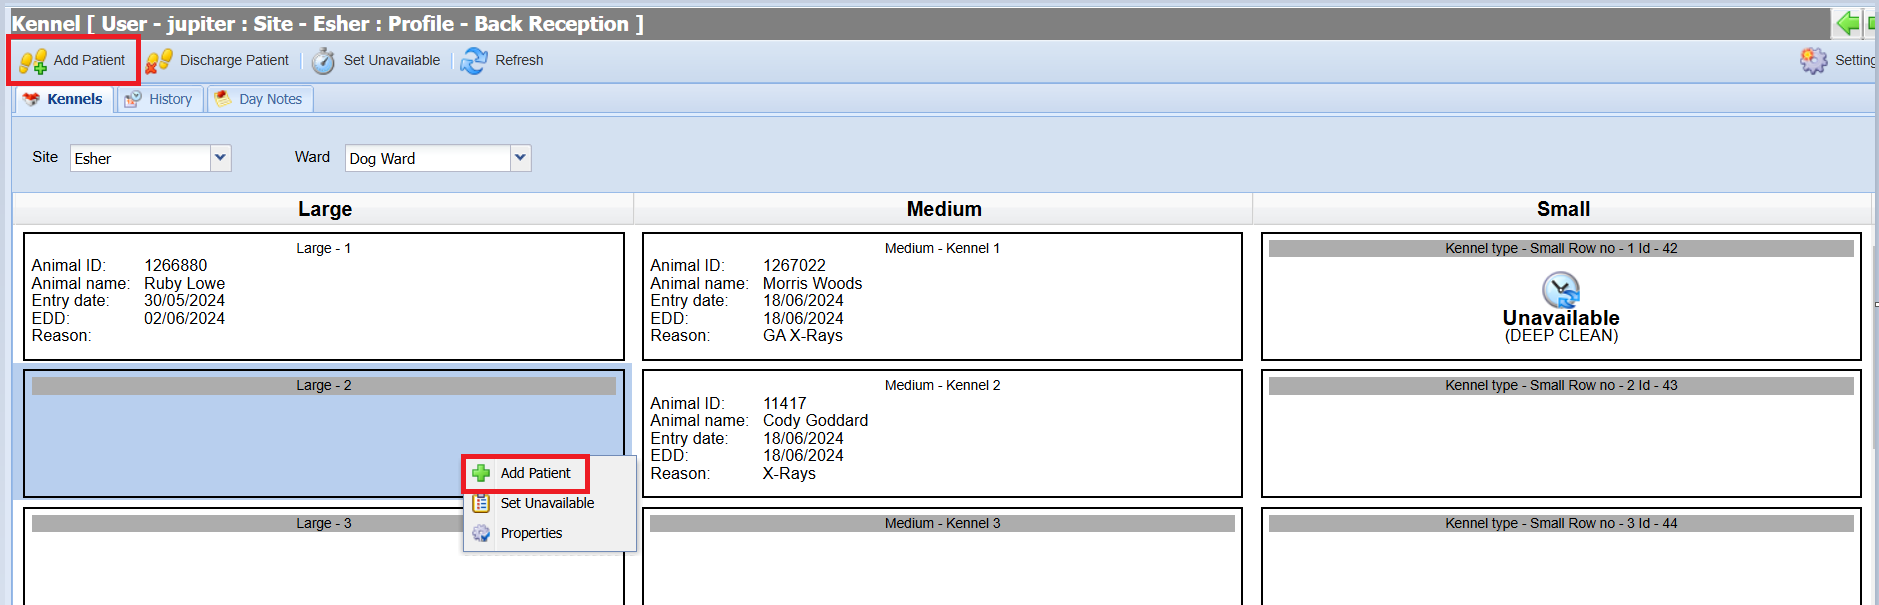
Once selected, the Kennel screen will display:

Adding a Patient to a Kennel
Select the Kennel you wish to add a patient to and either right click and select the ‘Add Patient' button, or select the 'Add Patient’ icon on the top left of the screen.
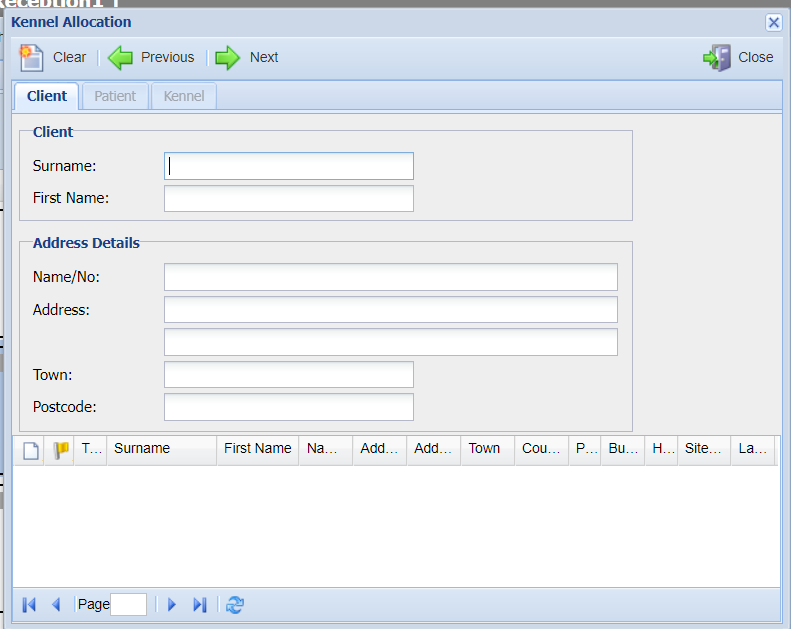
Search and select the patient you wish to add.
Once selected, insert the duration (days) for how long the animal will be in the kennel for along with a reason
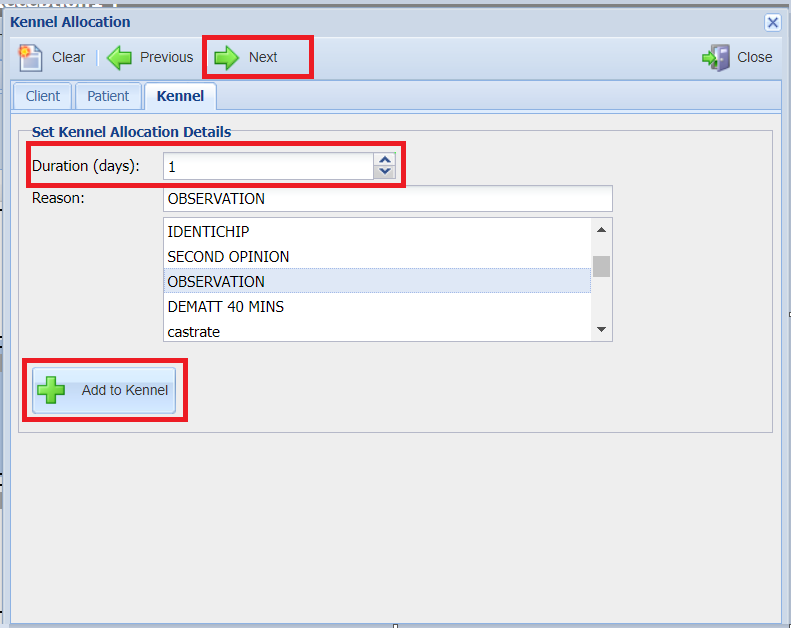 .
.To add the patient to the kennel, select 'Add to Kennel'.
The patient will be added to the kennel and displayed as below:


 .
.
Adding a patient to a Kennel from the Diary screen
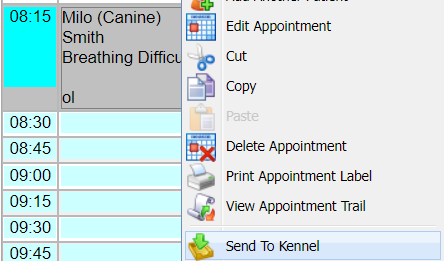
Navigate to the Diary.
Select the appointment, right click and select ‘Send To Kennel’.
The Kennel Allocation window will display. Insert the duration (days) for how long the animal will be in the kennel for along with a reason. Now select the Site, Ward, Kennel Type and select from the Available Kennels.

Select ‘Add To Kennel’


Adding a patient to a Kennel from the Send To option
Navigate to the patient History screen.
Select the ‘Send To’ option in the top left hand corner.

Select ‘Kennel List’
The Kennel Allocation window will display. Insert the duration (days) for how long the animal will be in the kennel for along with a reason. Now select the Site, Ward, Kennel Type and select from the Available Kennels.
Select ‘Add To Kennel’
Adding a patient to a Kennel from the Reception screen
Navigate to the Reception screen and load a client
Click once on the relevant patient
Right click and select ‘Send To Kennel’

The Kennel Allocation window will display. Insert the duration (days) for how long the animal will be in the kennel for along with a reason. Now select the Site, Ward, Kennel Type and select from the Available Kennels.
Select ‘Add To Kennel’
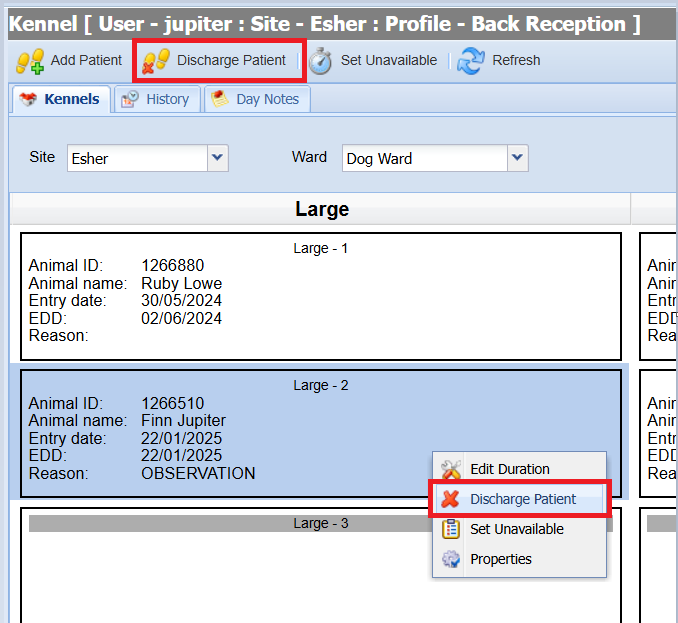
Discharging a Patient
Select the patient/kennel you wish to discharge
Select the ‘Discharge Patient' button, or right click and select 'Discharge Patient’

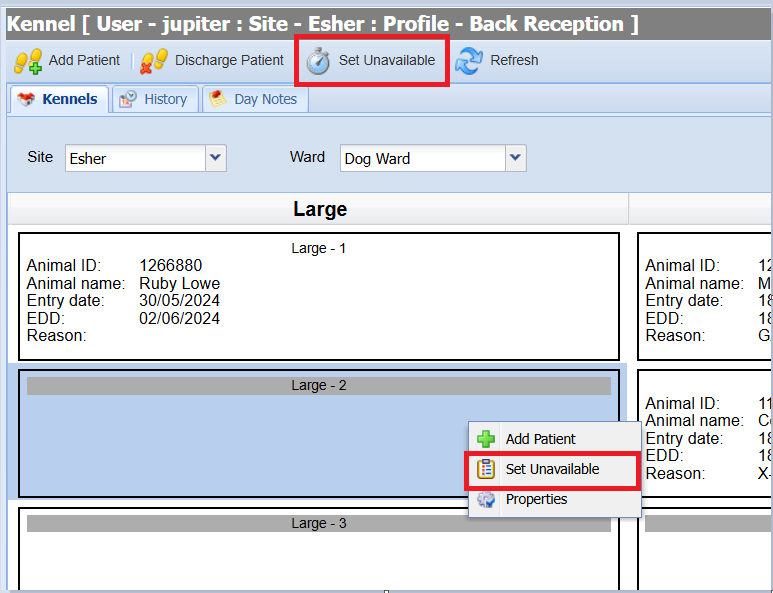
Set a Kennel as Unavailable
Select the kennel you wish to set as unavailable
Select the ‘Set Unavailable' button, or right click and select ‘Set Unavailable’.
A window will appear requesting information on when the kennel is unavailable from and to along with a reason.


Select 'Save' and the kennel will be marked as unavailable (as below) and you will be unable to add any patients to the kennel until it is available.

Modifying/Deleting Availability
Select an unavailable kennel and right click.
Select 'Modify Availability' and the below window will appear:

To modify the unavailable period select the correct unavailability from the list at the bottom, update the dates and select 'Save'. To delete the unavailable period, select 'Delete'.
Kennel History
An audit log of the Kennel can be accessed via the History Tab from the Kennels screen. This screen displays a history of any changes to Kennels for the dates specified.

Kennel Day Notes
The Kennels Day Notes tab is used to log notes in relation to kennels. This note will remain within the Kennel and does not display in any clinical history for the patients.
Adding a Kennel Day Note
Select the date and use the 'Day Notes' box to compose your message.
Once Composed, select 'Save' to add the note to the system.

Deleting a Day Note
- Select a Note from the listed Day Notes.
- Select the 'Delete' button.
