Using the Compliance Reminder Scheduler
For the Compliance Reminders to automatically send, you need to set-up your schedule and filters.
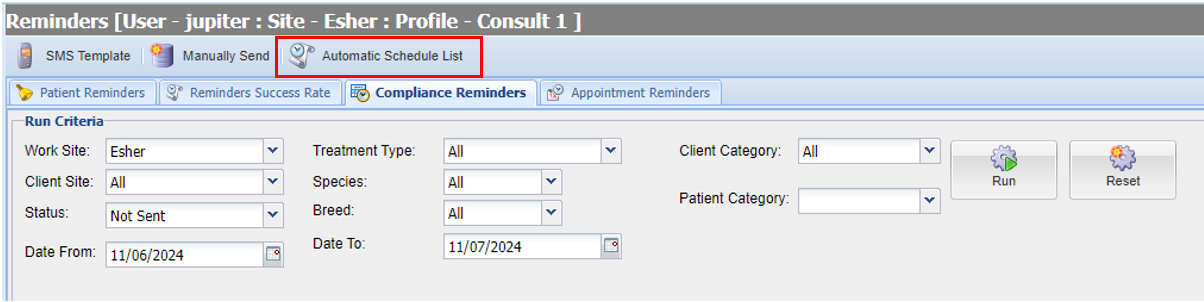
Navigate to the Compliance Reminders screen (Utilities > Reminders > Compliance Reminders tab).
Select 'Automatic Schedule List'.
The 'Automatic Schedule List' window will display.
To create a new schedule, select ‘Add'.
The Create/Edit Schedule window appears.
Type in the Schedule Name.
Set how often you would like the Compliance Reminders to send, what time they will send and also a start date.
‘for reminders due between the next X and X day(s)’ - This is how much notice you wish to give to clients. In the screenshot example below, an SMS and email will automatically send to the client 3 days before the pet is due their flea/wormer treatment.
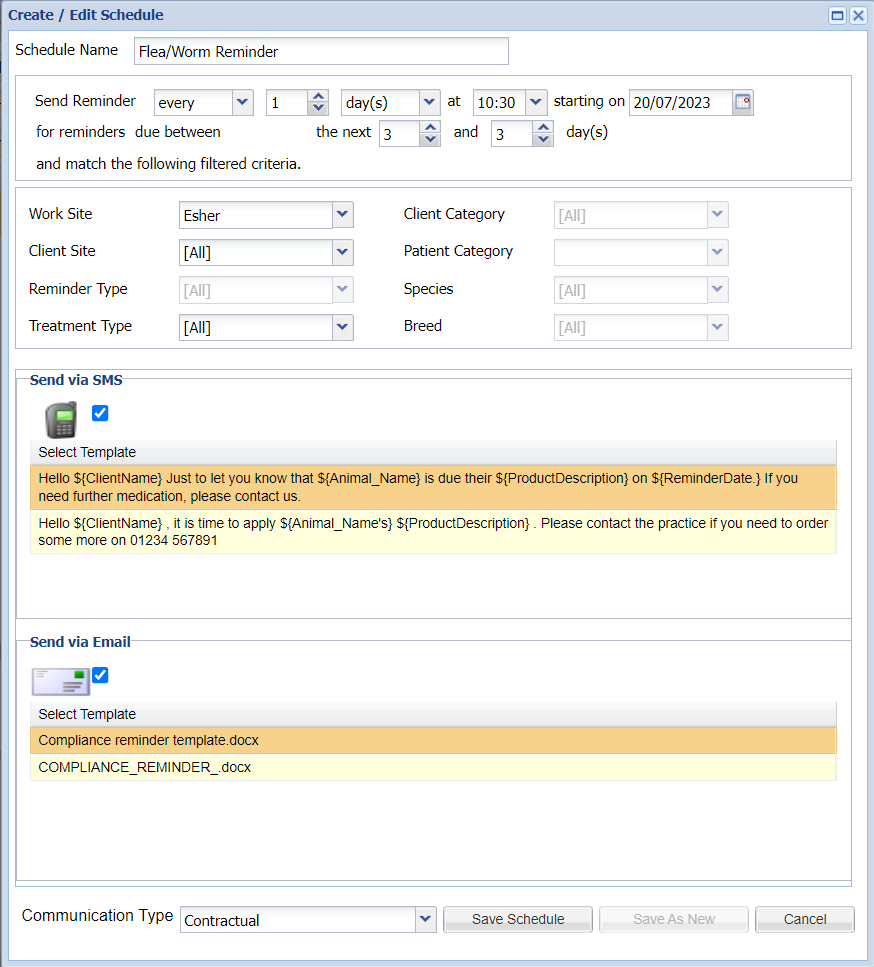
There are 3 filters available in this scheduler.
Work Site - This will default to the site you are logged in as. Please note - if you are a multi-site practice, a Compliance Schedule will require setting up per site.
Client Site - This allows you to filter down to the clients registered site for the schedule. It is advised to keep as 'All' to capture all relevant reminders.
Treatment Type - This allows you to filter the Treatment Type to be really specific with what is captured in a schedule. i.e. only sending the reminder for products listed under 'Tablets'. For standard Compliance Reminders, it is advised to keep this to 'All'.
Select the Communication Type and templates you wish to use. For more information on Communication Types, please see Reception > Client & Patient Registration > Client Data Consent.
Send via SMS = Tick the checkbox and select the SMS Template you want to use.
Send via Email = Tick the checkbox and select the Document Template you want to use.
Select 'Save Schedule' to create the scheduled task.
Note: any reminders sent will add an entry into the client communication tab.
Editing a Scheduled Task
- Open the The 'Automatic Schedule List' window.
- Select the task you wish to edit.
- Select 'Edit'.
- The Create/Edit schedule window appears, which allows you to modify the existing task.
- Once modified select 'Save Schedule'
Deleting a Scheduled Task
- Open the The 'Automatic Schedule List' window.
- Select the task you wish to delete.
- Select 'Remove'.
