Summary
The page details the various tabs available to store and view further detail within the client record.
Additional Information
Once a client has been registered, the Additional Information tab will allow you to store further details.
View Additional Info
To access the Additional Info tab, select a client and select the 'Additional Info' tab.
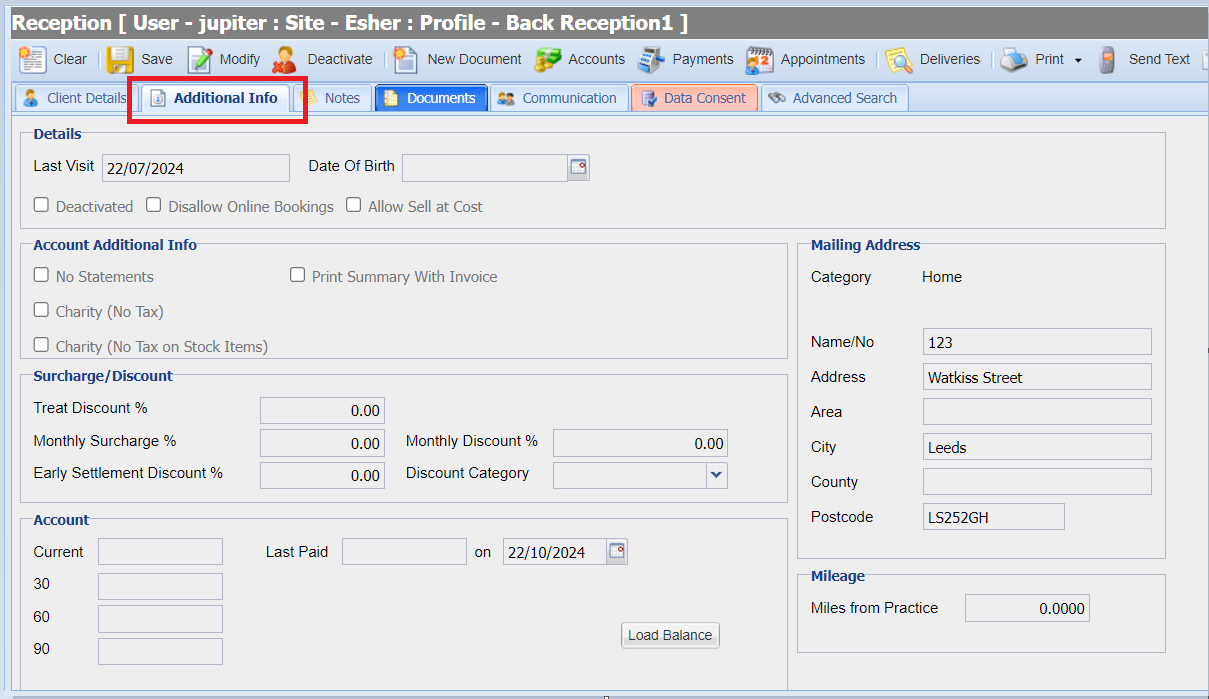
Additional Info fields function as below:
Field | Description / Function |
Last Visit | The date of the last entry on the client's account for any patient belonging to this client. This information is updated automatically and cannot be modified by the user. |
Deactivated | To deactivate (archive) a client therefore removing them from all future reporting and searching, tick this check box. It is not possible to deactivate a client who has an outstanding balance. |
Disallow Online Bookings | This is an indicator available to third-party services that you would like to disallow online appointments. The practice must check with the third-party online appointment provider that they support this field. |
Date Of Birth | An optional data field to allow the practice to store the date of birth of any willing clients. |
No Statements | Ticking this box will prevent this client from receiving statements during the month-end billing run, generated by the Debtors List. |
Print Summary with Invoice | When selected, this will generate a summary printout with an invoice from the accounts screen broken down into treatment category. |
Charity No Tax / No Tax on Stock Items | If either of these options are ticked, the client will either be charged no VAT on purchases or no VAT on purchases of stock items. |
Monthly Surcharge % | The monthly surcharge level to be applied to overdue debt for this client. This figure is a percentage and can be applied to current, 30, 60 or 90 days debts via the Debtors screen. |
Early Settlement Discount % | The percentage entered here determines how much Early Settlement Discount this client receives. This discount will be calculated and stored on the Debtors screen when the monthly debtors are run. |
Treat Discount % | This discount is applied automatically to any item that is sold to the client in question. For example, if a 10% figure was placed here, ALL items added in the treatment screen would be reduced in price by 10%. |
Monthly Discount % | This allows a monthly discount to be applied via the Clients Discounts icon under the Finance menu. This is used for clients who are allowed to run up an account. The percentage here will be used to decrease the monthly balance by that amount when the discount is applied via the Finance > Client Discounts. |
Discount Category | Clients can be placed into Discount Categories. These categories allow the practice to award different levels of discount to different clients on predetermined items. |
Current, 30, 60, 90 | Displays debt information by debtor periods: 0-30 days, 30-60 days, 60-90 days, more than 90 days. |
Last Paid … On | To view the amount the customer last paid and on what date, press ‘Load Balance’. |
Account / Client Categories | Account Categories are used to define what state the clients account is in and more categories can be added or edited. To apply an account category to a client, select the required category and move into the right hand side list using the arrows provided. |
Mailing Address | Displays the mailing address for the client, this address may not be the primary address shown on the Client Details tab of the Reception Screen. (Up to 3 addresses can be stored per client). |
Miles from Practice | Mileage allows practices to charge clients by the number of miles from the practice they are located. This feature is used in conjunction with the Code Entry option 'Link Qty to Mileage'. |
Notes
This tab is used to store Notes and Client Popup Notes relating to the client. If a client has any notes registered, the tab will highlight in blue.
Client Notes
This tab is used to add/delete notes related to the client. This tab is accessible after selecting a client in the Reception Screen. Note - Client notes are not included when a patient history is printed or emailed.
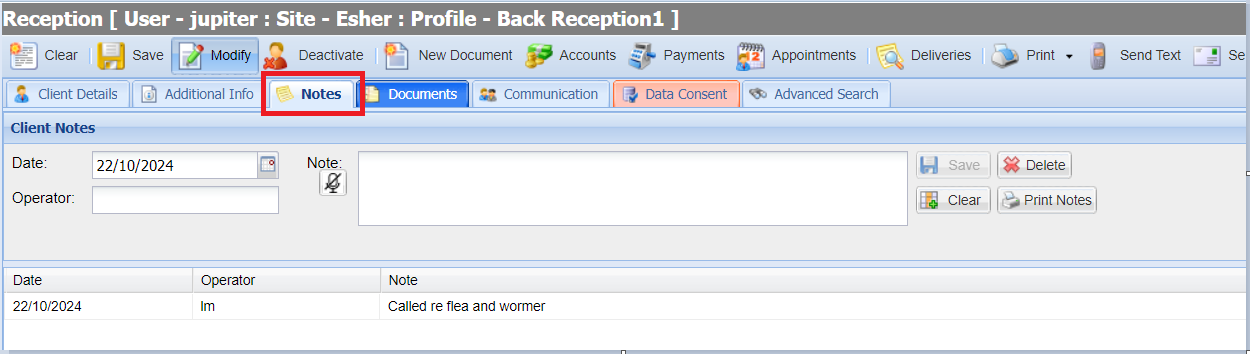
Add a Client Note
- Search and select a Client from Reception.
- Select the 'Notes' tab.
- Write the desired notes in the note field.
- Add your initials in the operator box and select 'Save'.
Delete a Client Note
- Search and select a Client from Reception.
- Select the 'Notes' tab.
- Select the note you wish to delete.
- Select the 'Delete' button
Client Popup Notes
Popup notes are used to notify users of important information when selecting a client throughout the following areas: Reception, History, Treatments and Accounts.

Add a Popup Note
Search and select a Client from Reception.
Select the 'Notes' tab.
Select the 'Modify' button.
Write your note in the lower text field.
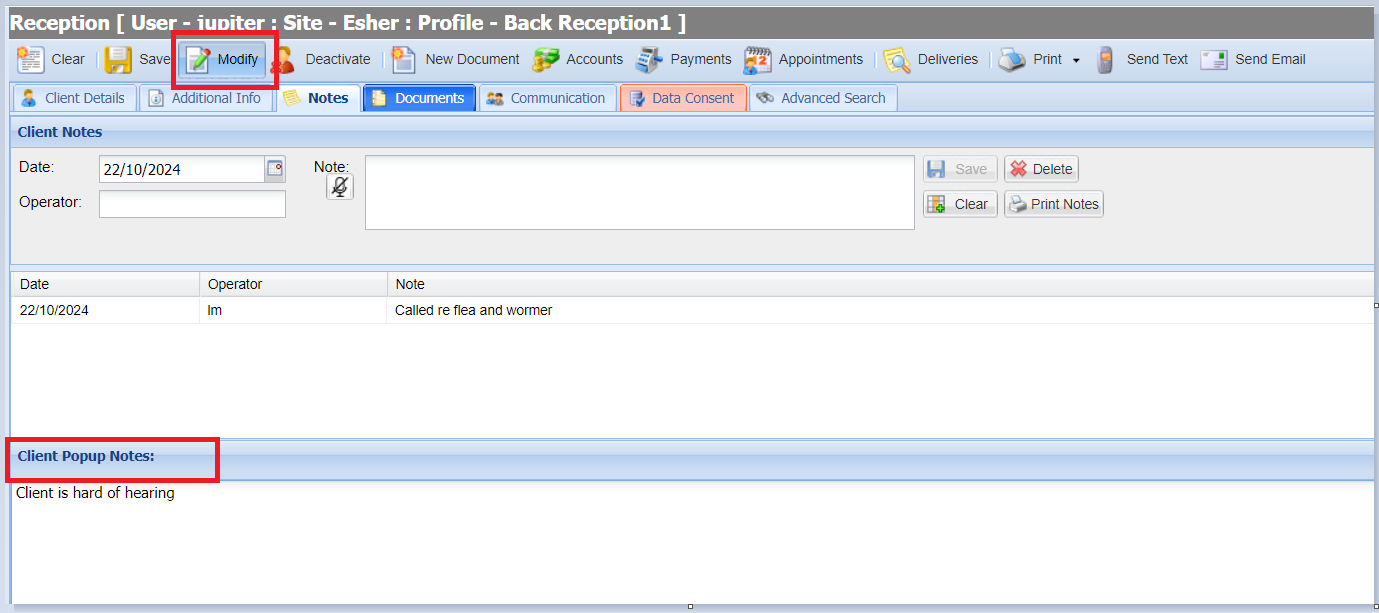
Select the 'Save' button.

Modify/Delete a Popup Note
- Search and select a Client from Reception.
- Select the 'Notes' tab.
- Select the 'Modify' button.
- Highlight the text and modify the content. If deleting, clear the content.
- Select the 'Save' button.
Documents
The Documents tab in Reception provides a history of any documents that have been generated for the selected client. Documents can be viewed, edited, downloaded, deleted, emailed and uploaded from this screen.
To access this tab, search and select a Client from the Reception screen and select the 'Documents' tab.

Viewing Documents
- Select the document line.
- Either double-click on the mouse or select the 'View Document' button.
- This will open the document for viewing.
Edit Document
- Select the document line.
- Select the 'Edit Document' button.
- This will open the document for editing.
- Then choose Save, Save and Close, Close without Saving or Insert Image.
Download Document
- Select the document line.
- Select the 'Download Document' button.
- This will download the document in it's current format.
Delete Document
- Select the document line.
- Select the 'Delete Document' button.
- Click Yes to confirm the request.
- The document will delete.
Email Document
- Select the document line.
- Select the ‘Email Document' or 'Email Document as HTML'

- The Merlin Email Client window will now show. If 'Email Document' was selected, the document will be an attachment to the email. If 'Email as HTML' was selected, the document will become the body of the email.
- The email contents can be amended if appropriate.
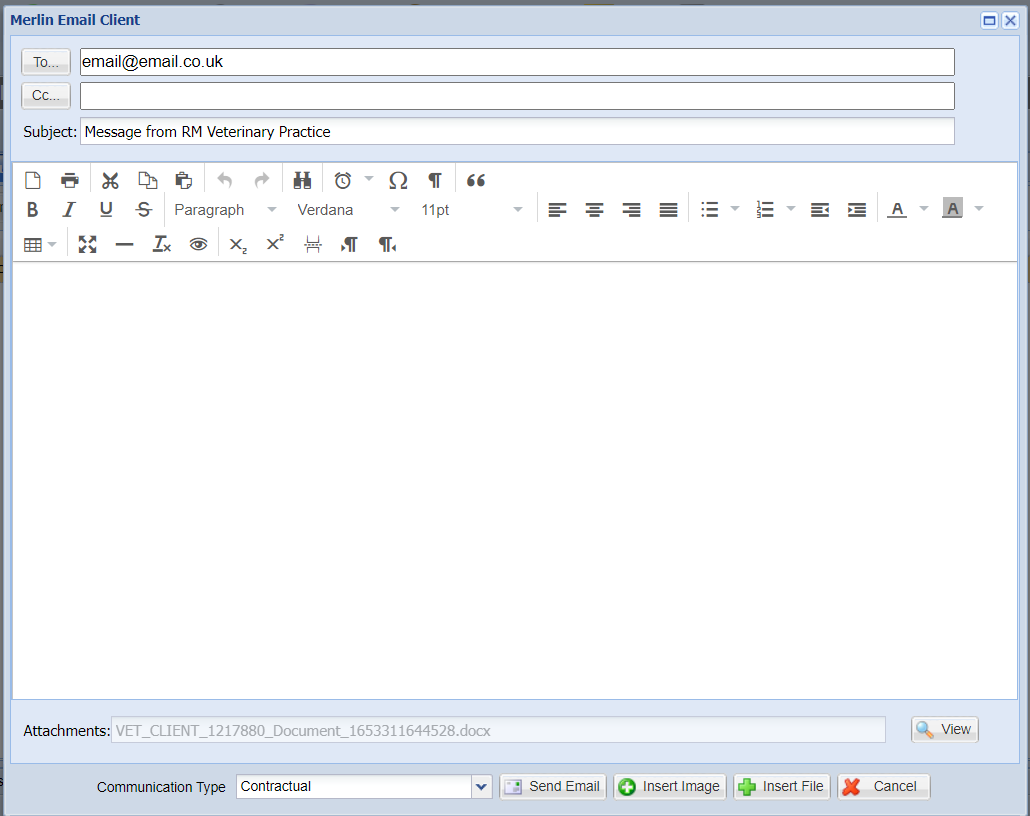
- Press ‘Send Email’


Note - The client must have an email address saved in their Client Details screen for the Merlin Email Client window to appear.
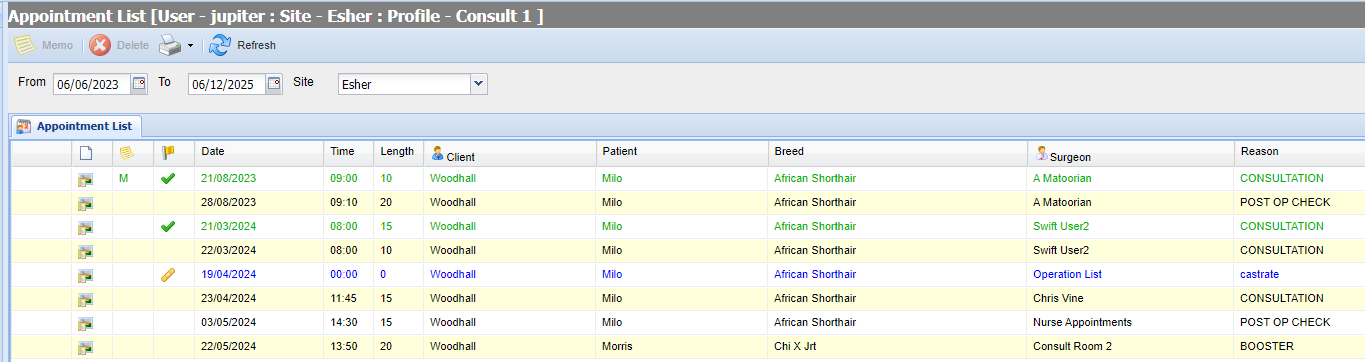
Viewing Appointments from Reception
To view any past or upcoming appointments for the client, click the icon:

The date range will display from 12 months prior, to 18 months in the future, but these dates can be modified by the user. Appointments for all patients will show.
Print from Reception
Under the Print tab, there are 3 options:

Print Client Label - This will print a client label to the assigned label printer.
Print Patient Label - A Patient Label will print to the assigned label printer.
Print Right To Access Report - A client has the right to know what data you hold about them. This report collates all the personal data for the selected client and generates as a PDF.
Please note that this report does not include information you may hold outside of Merlin or held incorrectly within the PMS. This report includes all client notes, account notes, popup notes and communications logs.
